
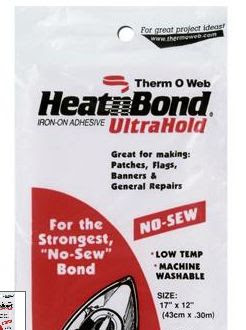
One of the awesome things about the Pazzles is that it cuts out fabric really easy, but you first have to prepare the fabric so that it doesn't fray.....Pazzles does sell mats especially for cutting out fabric, but from experience using Heat n Bond it cuts out better using the regular mat....So for this little project, you will need to purchase some Heat N Bond from your local craft store....This kind is the best to use:
You will need also about a 6 by 6 (inches) piece of fabric...(like a cotton or calico)

You will need also about a 6 by 6 (inches) piece of fabric...(like a cotton or calico)
Follow the directions on how to apply the Heat n bond to the back side of the fabric.
After you have attached the Heat n Bond, then you will need to peel off the layer on the back and apply the fabric to a sheet of cardstock.....it doesn't matter if the cardstock is thin, just don't apply it to a really heavy one....60 weight or lower is great.....again follow the directions on the package as to how to apply the fabric now onto the piece of paper....basically you will be just applying heat to the top of the fabric piece with the paper underneath it for just a few seconds...
Now the fabric is stiff enough to cut out on the Pazzles...
Open up your Pazzles software to a blank 12 by 12 inch paper size.
We will be using one of the pumpkin cuts that are already installed in the Pazzles machine.
Open up the Image Gallery to the right of the screen.
Click on the Magnified Glass..the first item to the left of the screen below.

This opens up a whole other gallery of images that are installed in your Pazzles.

In the Key Word section, type the word PUMPKIN and then hit FIND NOW....it might change your word to Costume....that is fine...the image we want to use is the PUMPKIN that comes up.

Then you want to click on the ADD button....at the bottom right corner under the pumpkin:

Hit close at the top and now the pumpkin should now be on your page at the bottom left.
Now we don't want to cut out all the extra stuff, we just want the pumpkin, so click on the pumpkin once and then click on SHAPE, THEN BREAK GROUP...If the BREAK GROUP doesn't grey out, do the procedure again...SHAPE, THEN BREAK GROUP

After it is grey out, you then want to click on all the parts you don't want....ie: the green background, mouth, eyes, noes and glasses....after you click on each item, click on delete on your keyboard.....You might have to move your items around to make sure you have deleted all unwanted items.....I clicked on the glasses , eyes and noes and mouth and then I moved the top orange piece and I discovered the yellow part underneath it to the right ....so I clicked on all of this and deleted it....until I only have the orange and green left....also great way of getting rid of the whole yellow part below is to draw an imaginary box around the whole yellow part and then hit delete.


This is want you want left:

Now it is time to draw an imaginary box around both of these parts to size it to the size you want.....making sure though that the orange pumpkin isn't bigger then the 6 by 6 inch of fabric that we will be cutting out.....After you get it the size you want, you will be able to see the size of the green stem....follow the same steps in preparing a piece of green or whatever color of fabric you want the stem to be with HEAT N BOND....
Place the fabric piece on the mat in the same location as it is on the screen...the hit CUT PROJECT.
These are the settings that I use to cut out my fabric:

BLADE 4
PRESSURE 23
SPEED 3
If your fabric doesn't cut out, you might need to play with the setting a bit or your needle my be dull.......
Here is a completed project:


14 comments:
Wow Regina Your tutorials are amazing!!!
Thank you so much for sharing your creative knowledge.
Beautiful project.
Lana
Oh my! This is amazing! Regina, you are amazing!
TOTALLY AMAZING!!!! You just enabled me to buy some of this stuff. I am sure with the new blade Cricut is coming out with, I will be able to cut fabric this way. You are just toooooo smart sis. This card is so beautiful.
Hugs, T
WOW, Regina this is AMAZING....I never would have guessed the Pazzles could cut fabric too....well already on cardstock and all....that is so COOL!!!! THANK YOU for sharing your ideas!! So CUTE!!! HUGS!!!
Absolutely beautiful Regina! I love the fabric you used and your instructions are wonderful! Thank you for sharing all your wonderful knowledge!
Great Regina! Where are all the old posts from this blog? I came back to look at how to use a Doodlebat and now it's gone! Do you remove the posts? Thanks for always helping us!
Nevermind....I just found the posts :-) heehee!
I love your tutorials. I've been helped so much when it comes to my Pazzles machine.
I've never tried cutting fabric, but this tutorial certainly makes me want to give it a try...
Thx for taking the time to write these tutorials... Looking forward to your next one...
Velma
Thank you so much for the tutorial you are amazing! I admire your cards with great jealousy keep up the fabulous projects.Also very excited to try this I had no idea the pazzles cut fabric.
O Regina another awesome project from you as usaly. Is there anything you can't do. I love it. Can you tell me how you made it into a card. I know you cut 2 out but how did you attach them to make a card.
TFS and thank you so much for your time.
Hi Tam, I welded two pumpkins...I will be doing a tutorial on making shape cards some time this month...hugs...
thankyou for your inspiring work
linnie
This is so awesome! I enjoy your projects...they are always so gorgeously put together! Wondering if you would recomend SCAL to use with the expression. I have read mixed reviews and never know who to trust...do you have any ideas!??
Thanks!
I am a quilter wanting to cut fabric with the pazzles. In your instructions, you suggest sticking the (heat n bonded) fabric to cardstock. What if you don't want it to be used in card-making or paper-crafting. There is a whole other world of sewers who would love to cut any design, any size for quilting and sewing applique. Have you tried to cut fabric on the pazzles without attaching to card-stock? Thanks, Cat
Post a Comment